

.gif)
This step-by-step guide explains how to create an automatic report in icCube that incorporates generative AI.
You can watch the video version of this tutorial here.
In this example, we will work with a retail dataset to demonstrate the process. The objective is to schedule a weekly report, delivered via email as a PDF, which includes actionable insights for product placement strategies.
By following this guide, you will learn how to:
- Integrate generative AI in your dashboard
- Automate email alerts to send dashboards containing AI
The use case
Imagine you are a product placement manager in a supermarket. Your goal is to optimize product placement and promotional strategies based on purchasing patterns.
For example, by arranging these items in close proximity or making special combined offers, you can enhance the likelihood of increased sales.
This is a typical basket analysis use case. There are various mathematical methods that can be used to perform this type of analysis. Now, you may not be a data analyst, so the idea here is to leverage generative AI to do this analysis for you.
Step 1: Setting Up the Dashboard
To begin, create a dashboard using a Print layout, ideal as the alert will generate a PDF. Here’s a guide to get started if needed.
Step 2: Adding the AI Chatbot Widget
Icy, the AI chatbot widget, introduced in icCube v8.4.14, allows for the integration of generative AI into your reports.
Insert the AI chatbot widget into the dashboard.
The AI chatbot needs to be bound to a specific widget in order to give insights about its data. Choose a widget that therefore contains relevant data for your analysis. Here we’ll be linking it to table number ‘ww0’, see image on step 1.
Tip: Make sure the widget that the AI chatbot is bound to contains all and only the data you need.

Since this is for a static PDF report, select Non Interactive mode. If the dashboard is also to be accessed live, you can leave this option disabled.
The Initial Question is an optional question sent to the AI assistant when the widget is rendering. As the purpose here is to create an automated report, this initial query is therefore required. Your prompt should be precise and effective.
Tip: Define a word count limit to ensure that the generated report fits neatly within a single page.
For this example, the AI is requested to conduct basket analysis using mathematical methods for identifying which products are frequently bought together and suggest optimal product proximity or bundle offers.
Step 3: Configuring Alerts for Automated Reports
Once the dashboard is ready, the next step is to automate its distribution. Read more about alerts here.
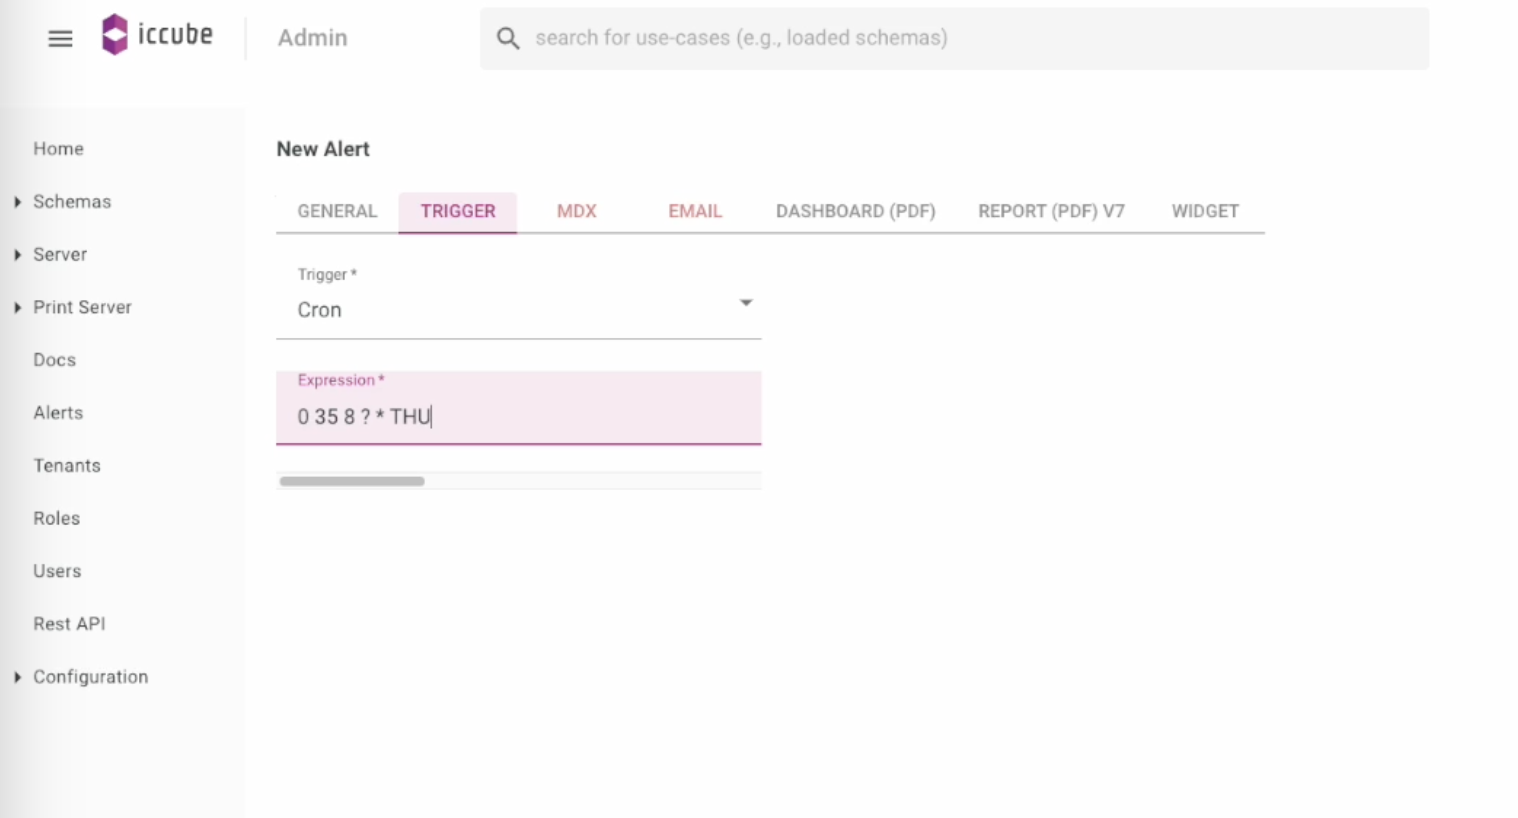
- Trigger: the trigger specifies when the alert should be activated. Alerts can be scheduled daily or at any interval of your choosing. If you are using a CRON trigger, you can test it using the menu on the top right. The CRON example shown here 0 35 8 ? * THU is setting for sending the email every Thursday at 8:35 AM.
Note: the time is the server time. You can check the current time on icCube’s Admin > Server > Status.
- MDX: specify the role, schema, and boolean expression. The latter here will simply TRUE but you could also define a conditional MDX expression.

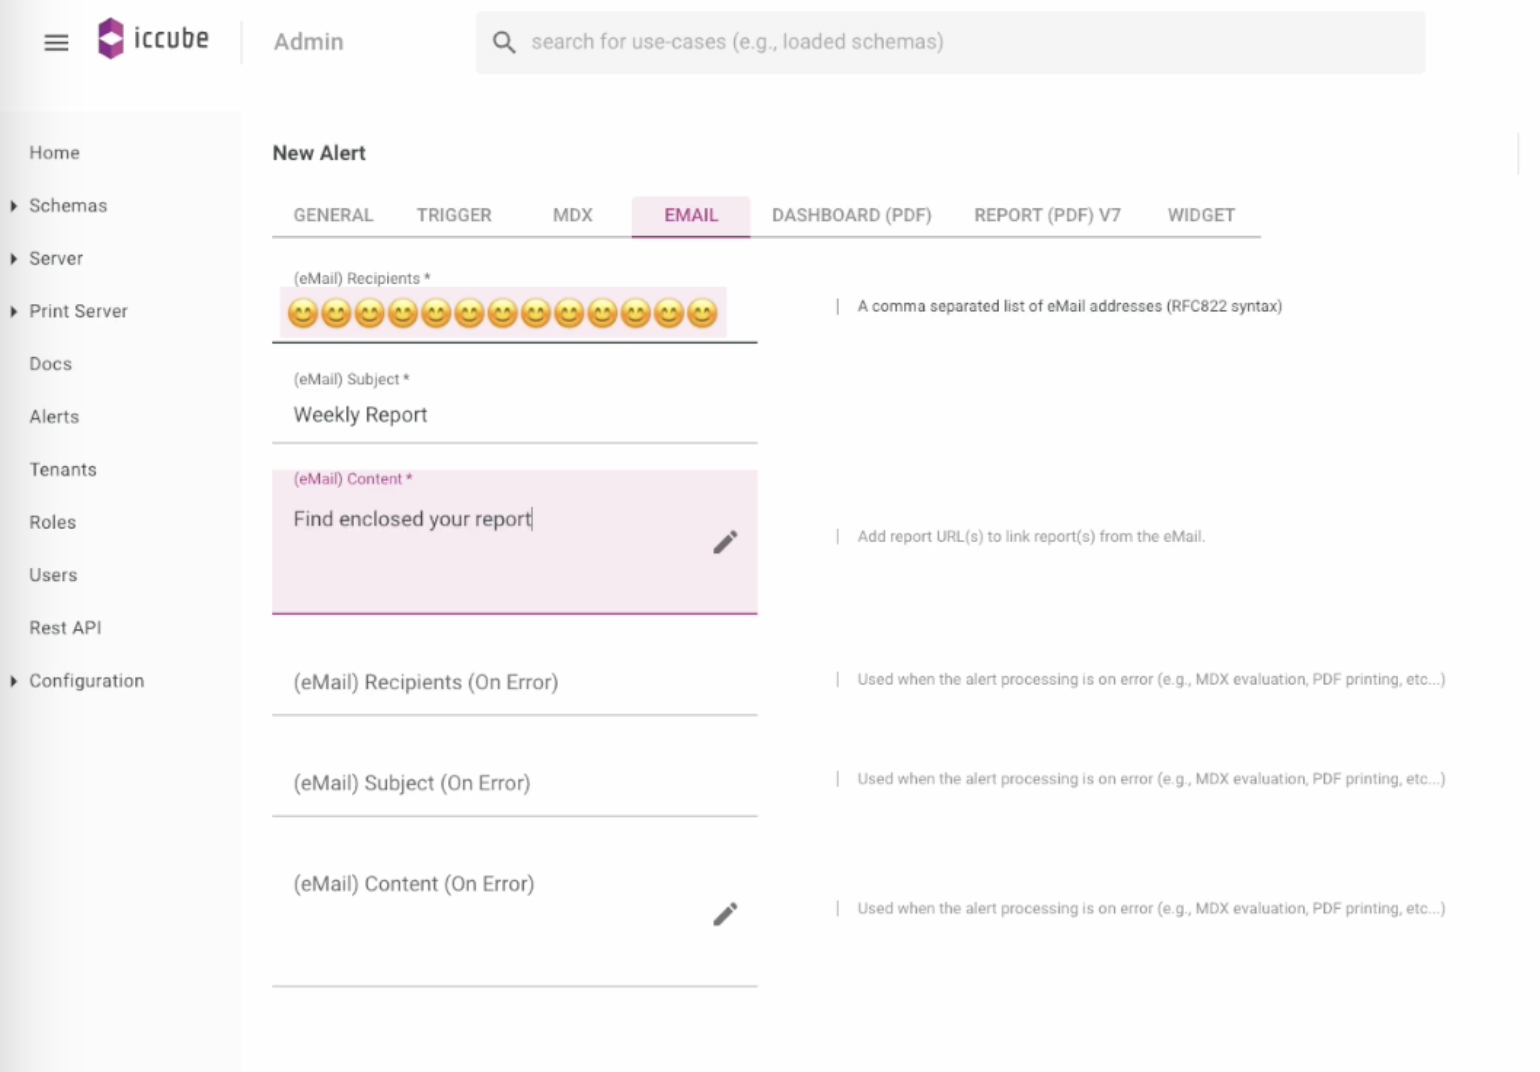
- Email: enter here the recipient(s), email subject and email content that will accompany the PDF report.
Tip: you can also add the direct link to the live dashboard within the email.
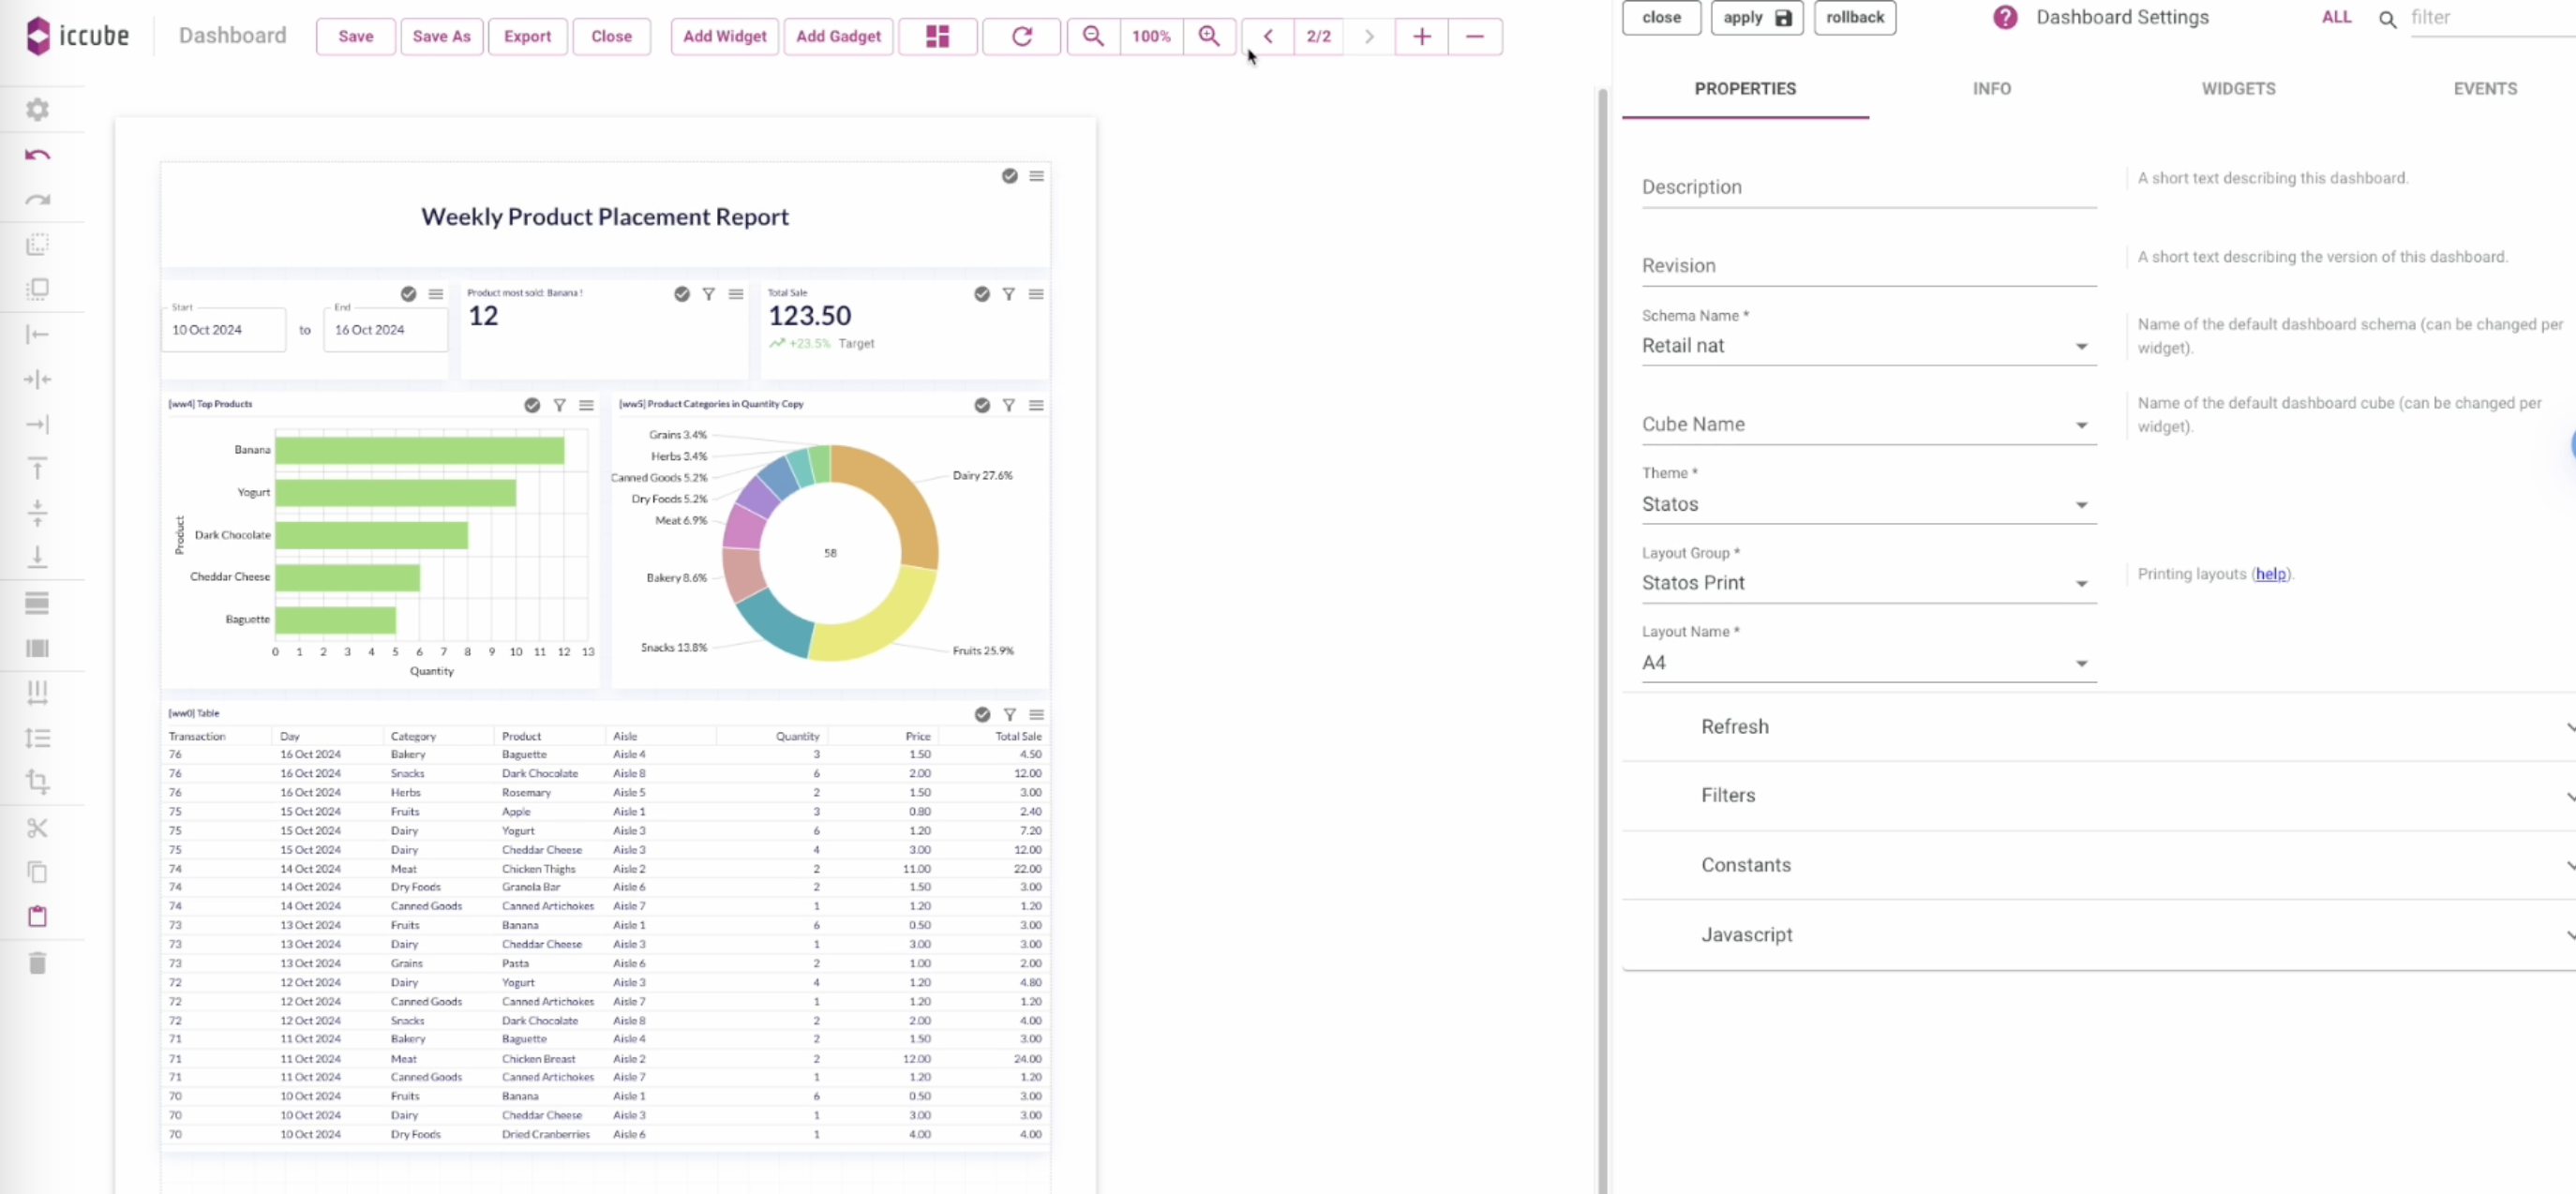
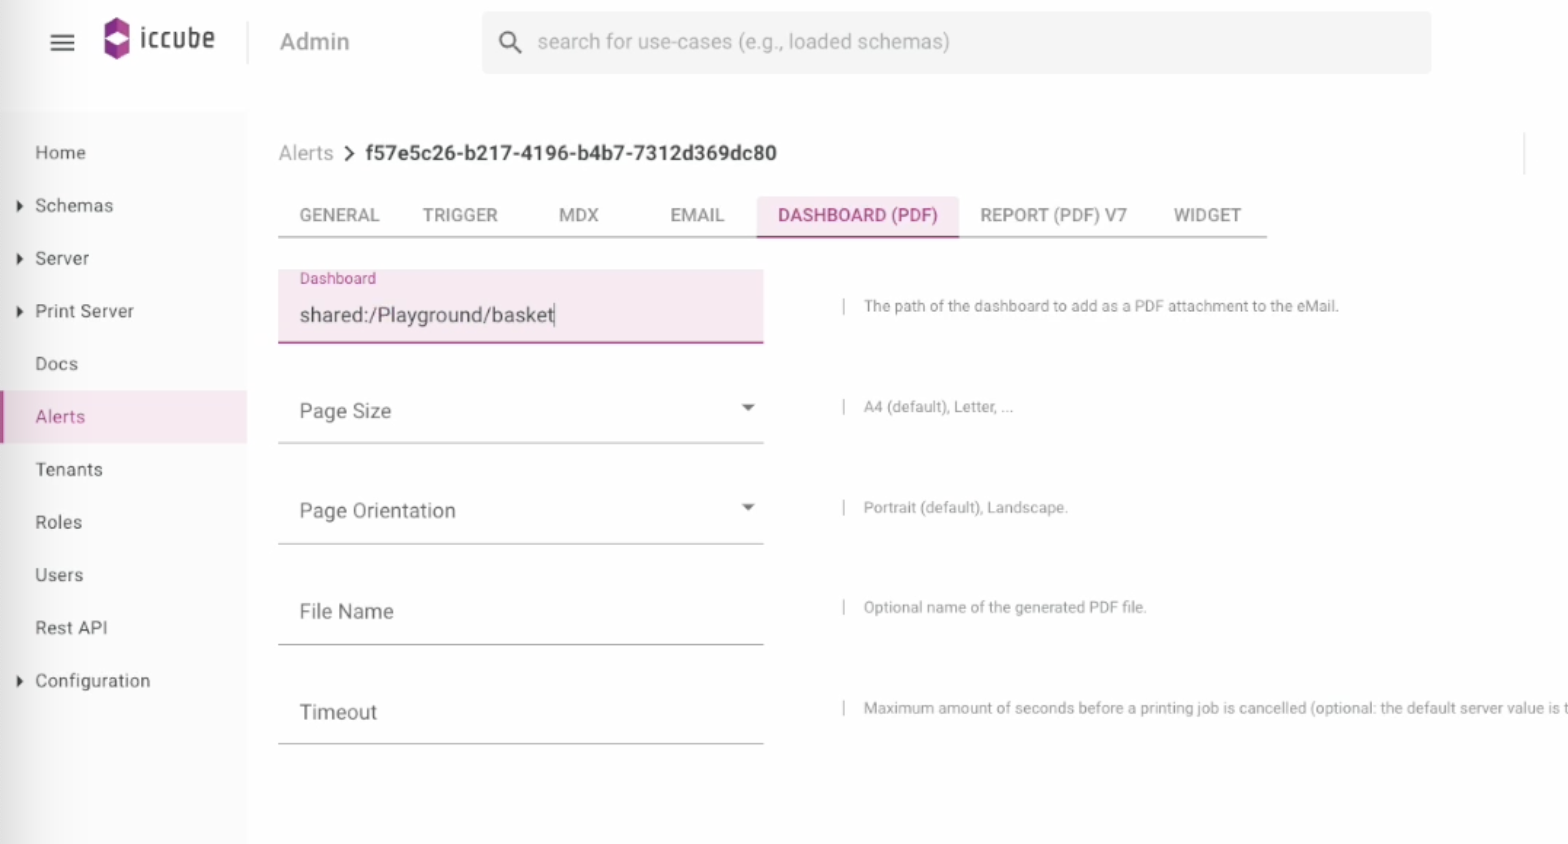
- Dashboard (PDF): specify the path of the dashboard that will be converted into a PDF. Find this in Dashboard Settings > Info > Dashboard Path.
Step 4: Receiving the Automated Report
After configuring the alert, the report will be sent automatically according to the schedule defined.
.gif)