


Here is a step-by-step guide on how to run icCube in a docker container, in both - with and without mapping files - scenarios.
We'll be showing the steps using Docker Desktop, but you can also use Podman. Check the alternatives section.
Dockers, containers, images, volumes
Let’s start with the basics. There is a new application you would like to explore, but you don’t want to install it on your computer (could be for many reasons such as space, security, or uncertainty if uninstalling it will actually remove it and all its files from your computer, etc). What’s an alternative? Containers!
In a nutshell:
- Docker = the platform allowing to build and run containers
- Container = the encapsulated environment that run the icCube application
- Image = the file that gives the instructions on how to build the icCube container
- Bind Mounts / Volumes = persistent data that remain after the container is deleted or re-created.
The difference between the two lies on how you want to create the directories: bind mounts are existing directories on the host machine that you then mount into a countainer, volumes are directories that are created in the Docker storage directory and are therefore managed by Docker.
Running a container avoids you from needing to install an application (and all its dependencies: e.g., JAVA virtual machine) in your machine. It literally separates the application from your infrastructure. You can therefore easily and quickly start, stop and remove it from your computer.
Getting started with Docker Desktop
You can use the terminal for everything, or you could also use the Docker Desktop as a graphical interface to manage your images and containers. Download it here: https://www.docker.com/products/docker-desktop/
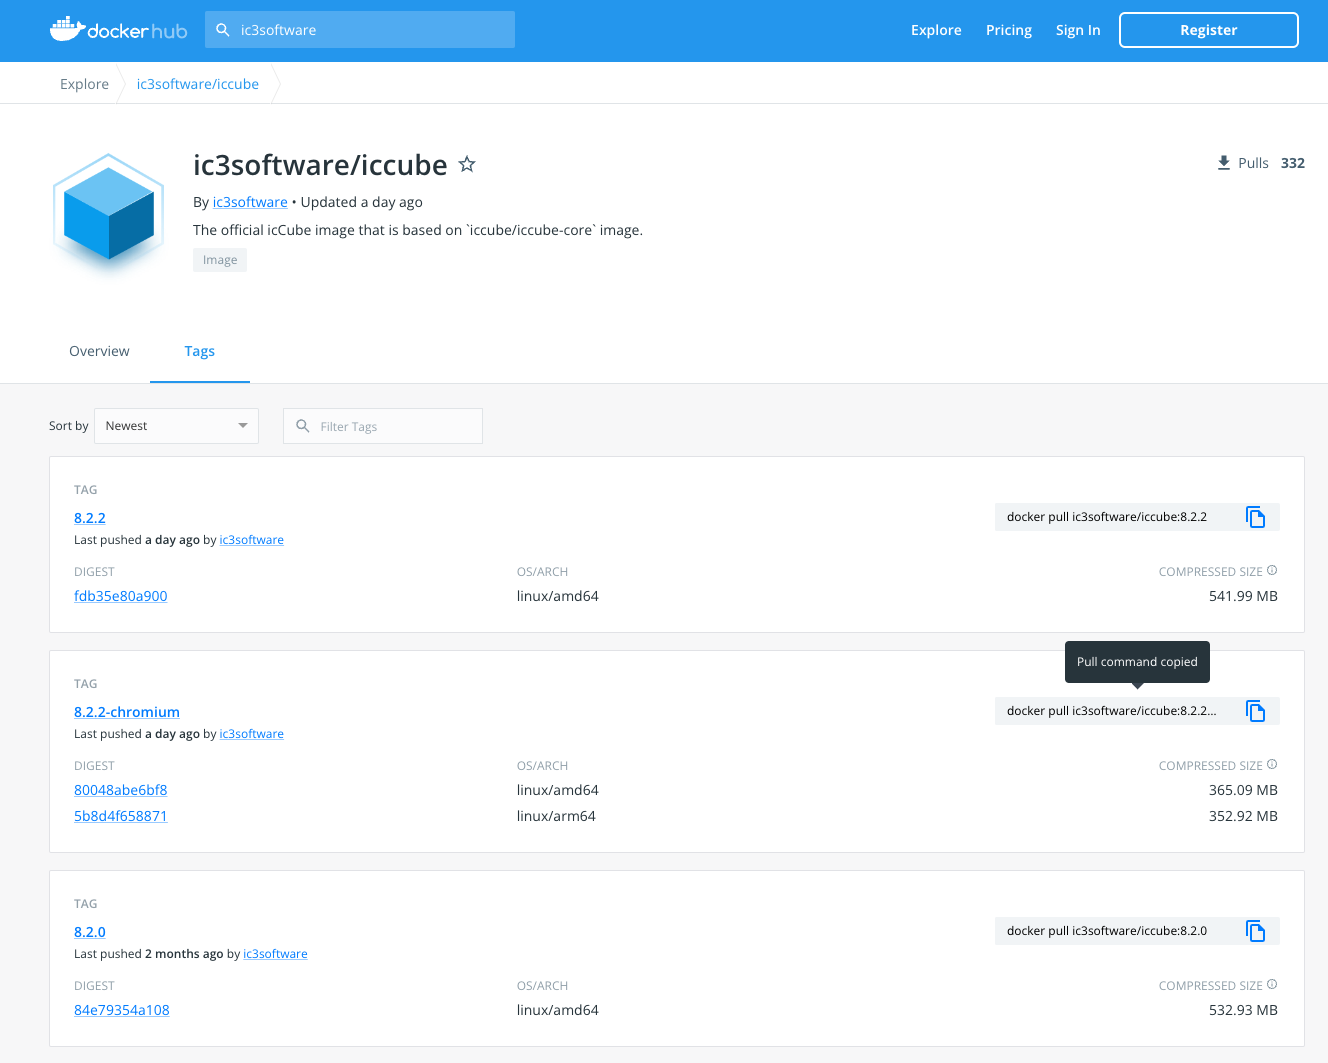
Go to the DockerHub website and find the image you would like to use, here’s icCube’s main page: https://hub.docker.com/u/ic3software
In the tags tab, you find the different versions available: https://hub.docker.com/r/ic3software/iccube/tags
8.x-chromium: this image is available for both AMD and ARM platforms (Chromium is being packaged - required for Dashboard printing). This is the image to use for Mac M1+ and ARM processors (e.g., Amazon AWS).
8.x: this image is available for AMD platforms only (instead of Chromium, Chrome is being packaged - required for Dashboard printing).
My first container
Let’s add the icCube image. Copy the command line of the desires tag, and paste it on your terminal:
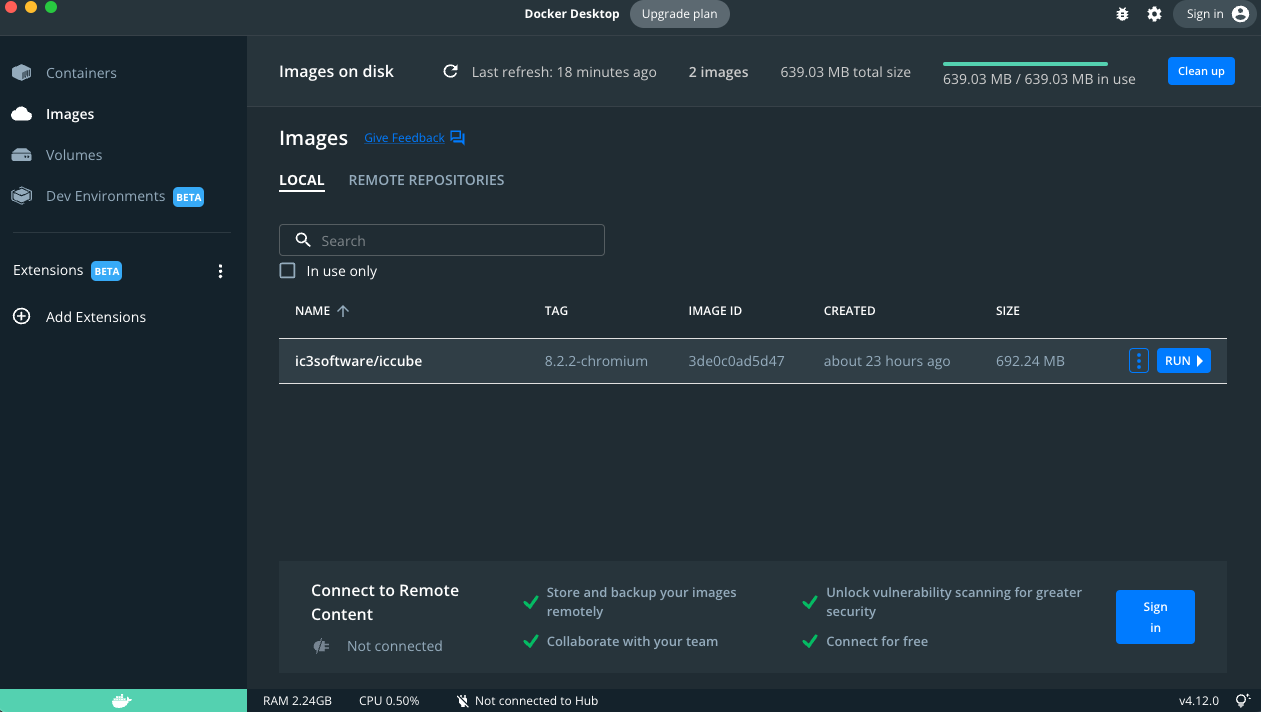
docker pull ic3software/iccube:8.2.2-chromium
You now have the image on the Docker Desktop.
Click on the RUN button and insert your container’s name and a port. The port is necessary, make sure you select a port that is not being used.
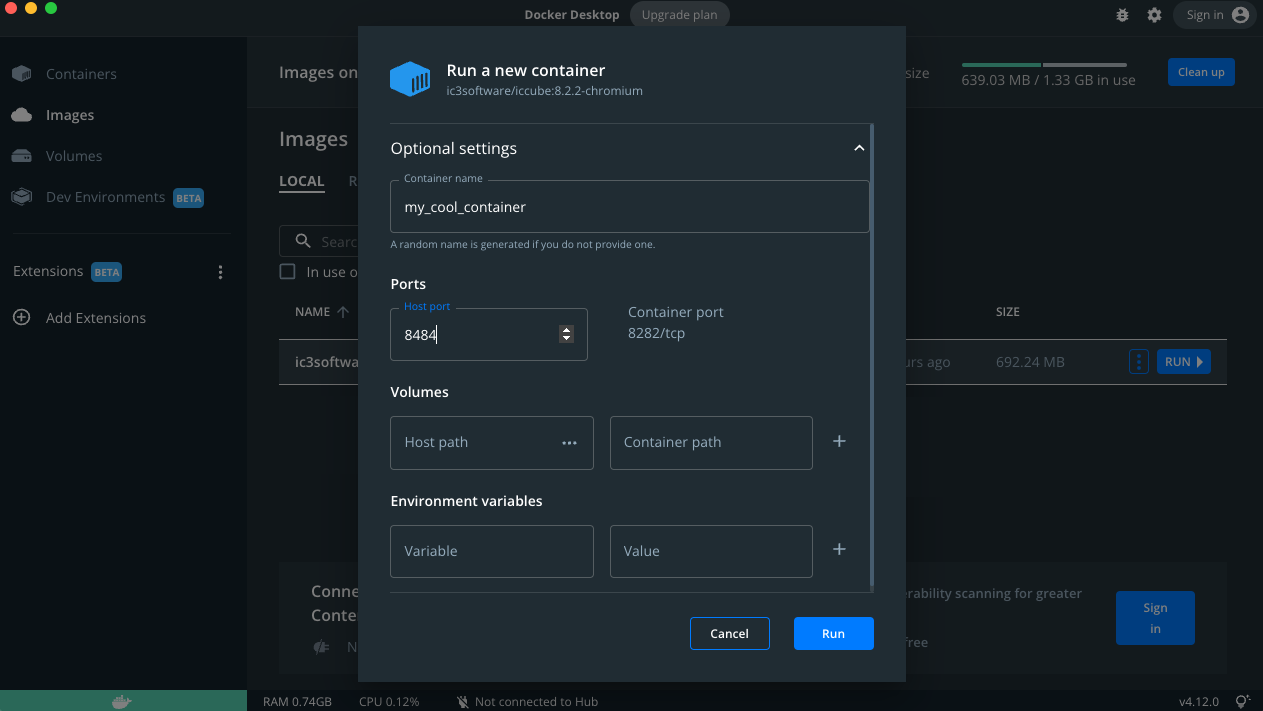
Open icCube in your browser with the link (mind the port!) : http://localhost:8484/icCube/console
Insert the username / password: admin / admin
And that’s it! You’re ready to use icCube.
You can stop your container anytime and even delete it.
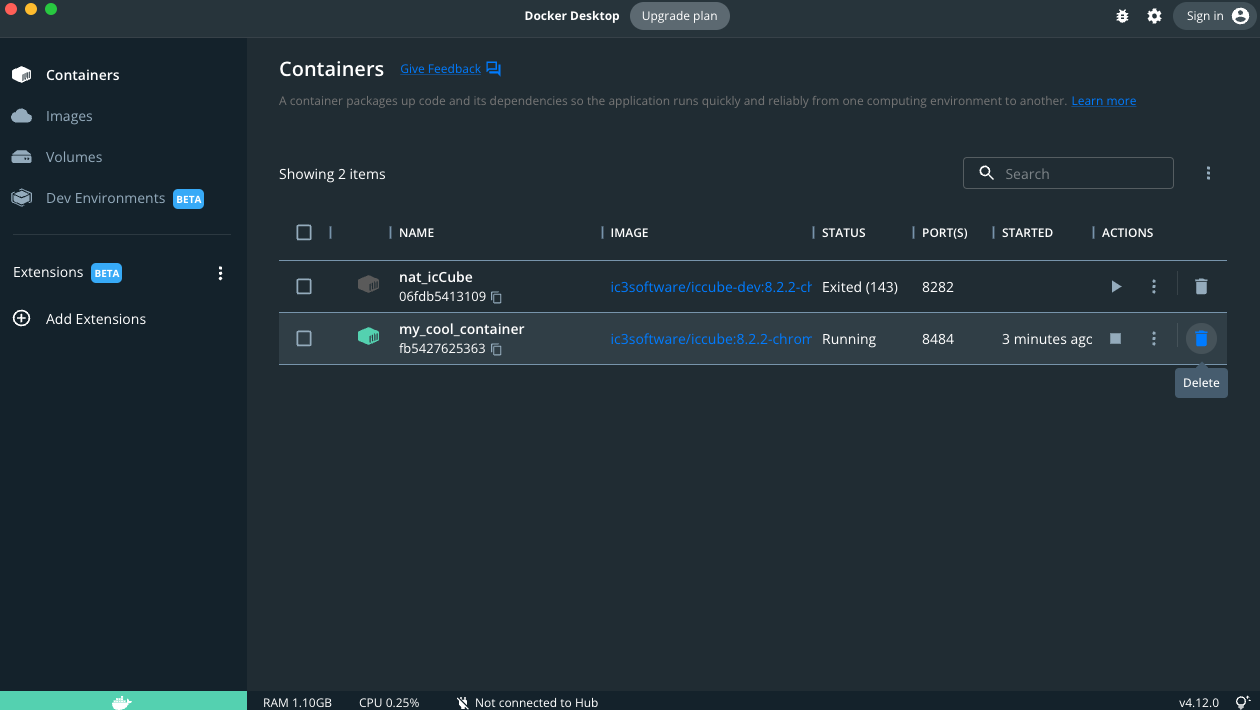
Note that if you delete it, you will be deleting all the data created by icCube (e.g., schema, dashboards, etc…) - they’ll be lost forever. There is a solution, you can instruct the container to use directories and/or files of your machine. Find below the steps on how to do so.
Container with local directories and files (bind mounts)
icCube schemas, data files, license and other contents are saved on files. If you want to keep this data after removing your Docker container, you can have a directory in your machine that will keep those files.
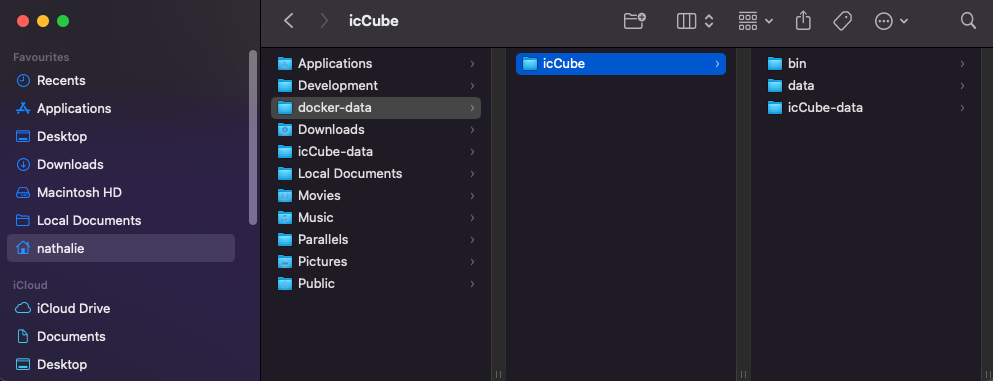
Let’s start by creating folders on your machine. I’ve created a docker-data directory where I’ve added an icCube folder with bin, data and icCube-data folders.
In case you have already started working with a local icCube before:
- copy to bin your icCube-4.lic license file (if you have an OEM, Enterprise or Corporate license),
- to data the files of your icCube file system,
- and to icCube-data the corresponding content.
Now we need to map those folders and files to your container.
The icCube’s Github Docker page contains the script run_icCube.sh to run a container with local files and directories as bind mounts.This page explains how to set these configurations.
Let’s modify it according to our example. Change the icCube path to /Users/nathalie/docker-data/icCube, change the port, here I’ve set it to 8585 (instead of 8282), and mapped the folders we just created:
#!/bin/sh
ICCUBE=/Users/nathalie/docker-data/icCube
ICCUBE_BIN=$ICCUBE/bin
ICCUBE_WEB_DATA=$ICCUBE/data
ICCUBE_DATA=$ICCUBE/icCube-data
docker run -d --name my_cool_container_with_mapped_files \
-e ICCUBE_JAVA_OPTS="-Xms1g -Xmx1g" -e ICCUBE_CHROME_NO_SANDBOX=1 \
-p 8585:8282 \
-v "$ICCUBE_DATA:/home/ic3/icCube-data" \
-v "$ICCUBE_WEB_DATA:/home/ic3/data" \
-v "$ICCUBE_BIN/icCube-4.lic:/opt/icCube/bin/icCube-4.lic" \
ic3software/iccube-dev:8.2.2-chromium
# docker logs -f icCube
Save this file within your /Users/nathalie/docker-data/icCube folder.
Now we’re ready to run the container. In your terminal, place yourself on your icCube folder and run your sh file with the command ./run_icCube.sh

You will see your new container appear on your Docker Desktop.

Open icCube in your browser with the link (mind the port!) : http://localhost:8585/icCube/console
Insert the username / password: admin / admin
And now you have your icCube running in your Docker container with files saved on your machine. I.e., if you create schemas, add files to your icCube file system, create dashboards, etc, these files will be saved on your computer and remain after you delete the container.
Alternatives to Docker Desktop
Docker Desktop is only free for small companies and individuals (fewer than 250 employees AND less than $10 million in annual revenue). If you are working for a big company and do not have a Docker Desktop license you can use an alternative software as Podman.